Soldering Iron Temperature Guide (Settings Chart)
The right soldering iron temperature by solder type and job — plus solder melting points, desoldering and hot air settings, and how hot basic 25W–60W irons really run.
Written by Kerem Başbuğ · Last updated September 16, 2026 · How we rank
5 min read
Affiliate disclosure: As an Amazon Associate we earn from qualifying purchases. We may earn a commission when you buy through links on this page — at no extra cost to you. Read our affiliate disclosure for details.
Temperature is one of the most misunderstood parts of soldering. Beginners often crank the iron as hot as it goes, thinking it’ll be faster — and then wonder why their joints and tips suffer. Here’s how to get it right, with charts you can keep open next to the bench.
The quick chart
| Job | Leaded solder | Lead-free solder |
|---|---|---|
| General through-hole electronics | 315–340°C (600–650°F) | 350–370°C (660–700°F) |
| Small / surface-mount components | 300–325°C (570–620°F) | 340–360°C (645–680°F) |
| Large joints, ground planes, thick wire | 340–370°C (650–700°F) | 370–390°C (700–735°F) |
These are starting points, not laws. The guiding rule: use the lowest temperature that lets you make a clean joint in about 2–3 seconds.
Solder melting points (and why the iron runs hotter)
Your iron is set far above the melting point of the solder — and that is correct. The tip has to push heat into a cold pad and component lead fast enough to melt the solder and let it flow before the flux burns away. A tip roughly 100–150°C above the solder’s melting point does that without cooking the board.
| Solder alloy | Melting point | Typical iron setting |
|---|---|---|
| Sn63/Pb37 (63/37, eutectic) | 183°C (361°F) | 315–340°C (600–650°F) |
| Sn60/Pb40 (60/40) | 183–190°C (361–374°F) | 315–340°C (600–650°F) |
| SAC305 (tin-silver-copper, lead-free) | 217–220°C (423–428°F) | 350–370°C (660–700°F) |
| Sn99.3/Cu0.7 (tin-copper, lead-free) | about 227°C (441°F) | 360–380°C (680–715°F) |
Lead-free solder melts around 35–40°C higher than leaded, which is why every lead-free row in these charts sits a little hotter. For the full comparison, see lead-free vs leaded solder.
Temperature by task
Beyond everyday joints, a few jobs have their own rules of thumb (leaded solder unless noted):
| Task | Starting point | Notes |
|---|---|---|
| Tinning a new tip | Your normal working temperature | Coat the tip with solder as it first heats up |
| Wires 26–22 AWG | 320–340°C (610–645°F) | Small chisel tip |
| Wires 20–16 AWG | 340–360°C (645–680°F) | Medium chisel tip |
| Thick wire, connectors, terminals | 360–380°C (680–715°F) | Large tip and plenty of wattage matter more than heat |
| Desoldering with wick or a pump | 10–30°C above your soldering setting | Add fresh flux first |
| Drag soldering fine-pitch SMD | 300–330°C (570–625°F) | Lots of flux; a hoof or bevel tip |
| Hot air rework | Commonly ~300–400°C | Depends on part, nozzle and airflow — start low |
For wire technique, see how to solder wires together; for hot air, see SMD rework with hot air and reflow.
Why hotter isn’t better
A regulated iron holds whatever temperature you set, so running it hot doesn’t help — it hurts:
- Flux burns off instantly, before it can clean the joint, so solder won’t flow well.
- Components get damaged by excess heat.
- Tips oxidize fast, going black and dead (see tip care).
- Pads can lift off the board.
What actually makes soldering fast is wattage (heat recovery), not temperature. A 60W iron recovers heat between joints quickly even at a moderate temperature — which is why a good station matters more than a sky-high number.
What about irons without temperature control?
Cheap plug-in irons are sold by wattage — 25W, 30W, 40W, 60W — with no temperature dial at all. That number is how much power the element draws, not how hot the tip gets.
An unregulated iron simply heats up until it loses heat to the air as fast as the element supplies it. The result:
- At idle it often runs hotter than electronics needs, which blackens the tip and burns flux.
- On a big joint it drops, because nothing tells the element to push harder.
- Lower wattage struggles more on thick wires and ground planes; higher wattage recovers better but can idle hotter still.
The exact idle temperature varies by model and tip, so there is no reliable “40W equals X degrees” figure. If you are stuck with a basic iron, keep contact short, keep the tip tinned, and unplug it between long pauses. Better still, a temperature-controlled iron or station removes the guesswork — some basic kits now include a dial, which is a big step up.
Soldering guns — the pistol-grip, transformer type — are a separate case: they heat in seconds and run very hot for heavy wire, stained glass and terminals. They are the wrong tool for circuit boards.
Reading your joints
Let the joint tell you if the temperature is right:
- Too cold: solder balls up instead of flowing, joints look dull, grainy or blobby. → Raise the temperature 10–20°C, add flux.
- Too hot: flux smokes the instant it touches, the tip discolors quickly, boards scorch. → Lower it.
- Just right: solder flows smoothly and wets the joint in 2–3 seconds, leaving a smooth cone.
A dull, grainy joint can also be a cold joint caused by movement while it cooled — our cold solder joint guide shows how to tell the difference and fix it.
Don’t forget the variables
Two joints can need different settings:
- Bigger thermal mass (thick wire, ground planes, large pads) pulls heat away, so it needs more — raise the temperature or use a broader tip.
- Tip size and shape matter. A larger chisel tip delivers far more heat than a fine conical tip at the same setting, so switching tips often beats turning up the dial.
- A clean, tinned tip transfers heat far better than a dirty one, so tip condition matters as much as the dial.
- Fresh flux lets solder flow at a lower temperature; adding a little makes almost every stubborn joint easier.
°C to °F conversion
| °C | °F |
|---|---|
| 300 | 572 |
| 320 | 608 |
| 340 | 644 |
| 350 | 662 |
| 370 | 698 |
| 400 | 752 |
Set a sensible temperature, keep your tip clean, and practice reading your joints on a cheap practice board. Combine this with our beginner guide and good joints become second nature.
Recommended kits from this guide
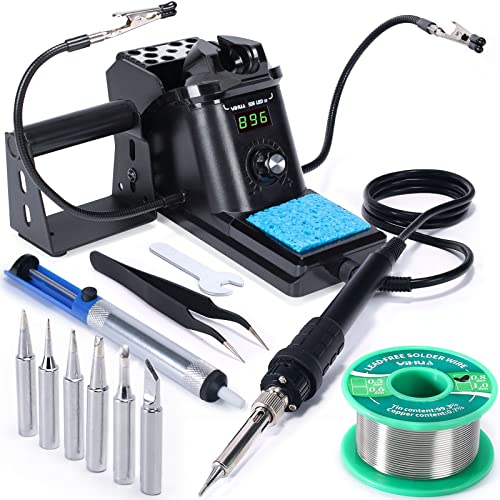
YIHUA
YIHUA 926 III 60W Soldering Station
A temperature-controlled station bundled with everything to start.
We earn a commission, at no extra cost to you.
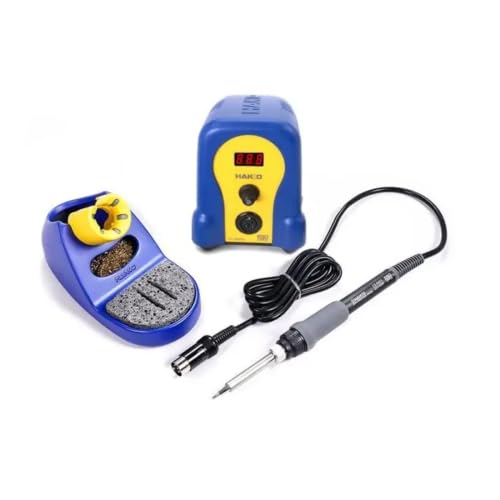
Hakko
Hakko FX-888DX Digital Soldering Station
The classic hobbyist-to-pro bench station, now with a rotary dial.
We earn a commission, at no extra cost to you.

Gikfun
Gikfun SMD/SMT Welding Practice Board (EK7028)
Step up from through-hole to surface-mount with a dedicated training board.
We earn a commission, at no extra cost to you.